 SnapActions
 Beat Detector
 AnyPaste
 Emoji Picker
Smoothify is a free extension inside blinkl.io that helps you create smoother, more natural animations in Adobe Premiere Pro. Follow these simple steps to apply smooth motion curves to your keyframes.
Full tutorial here
Step 1 – Add keyframes in Premiere Pro
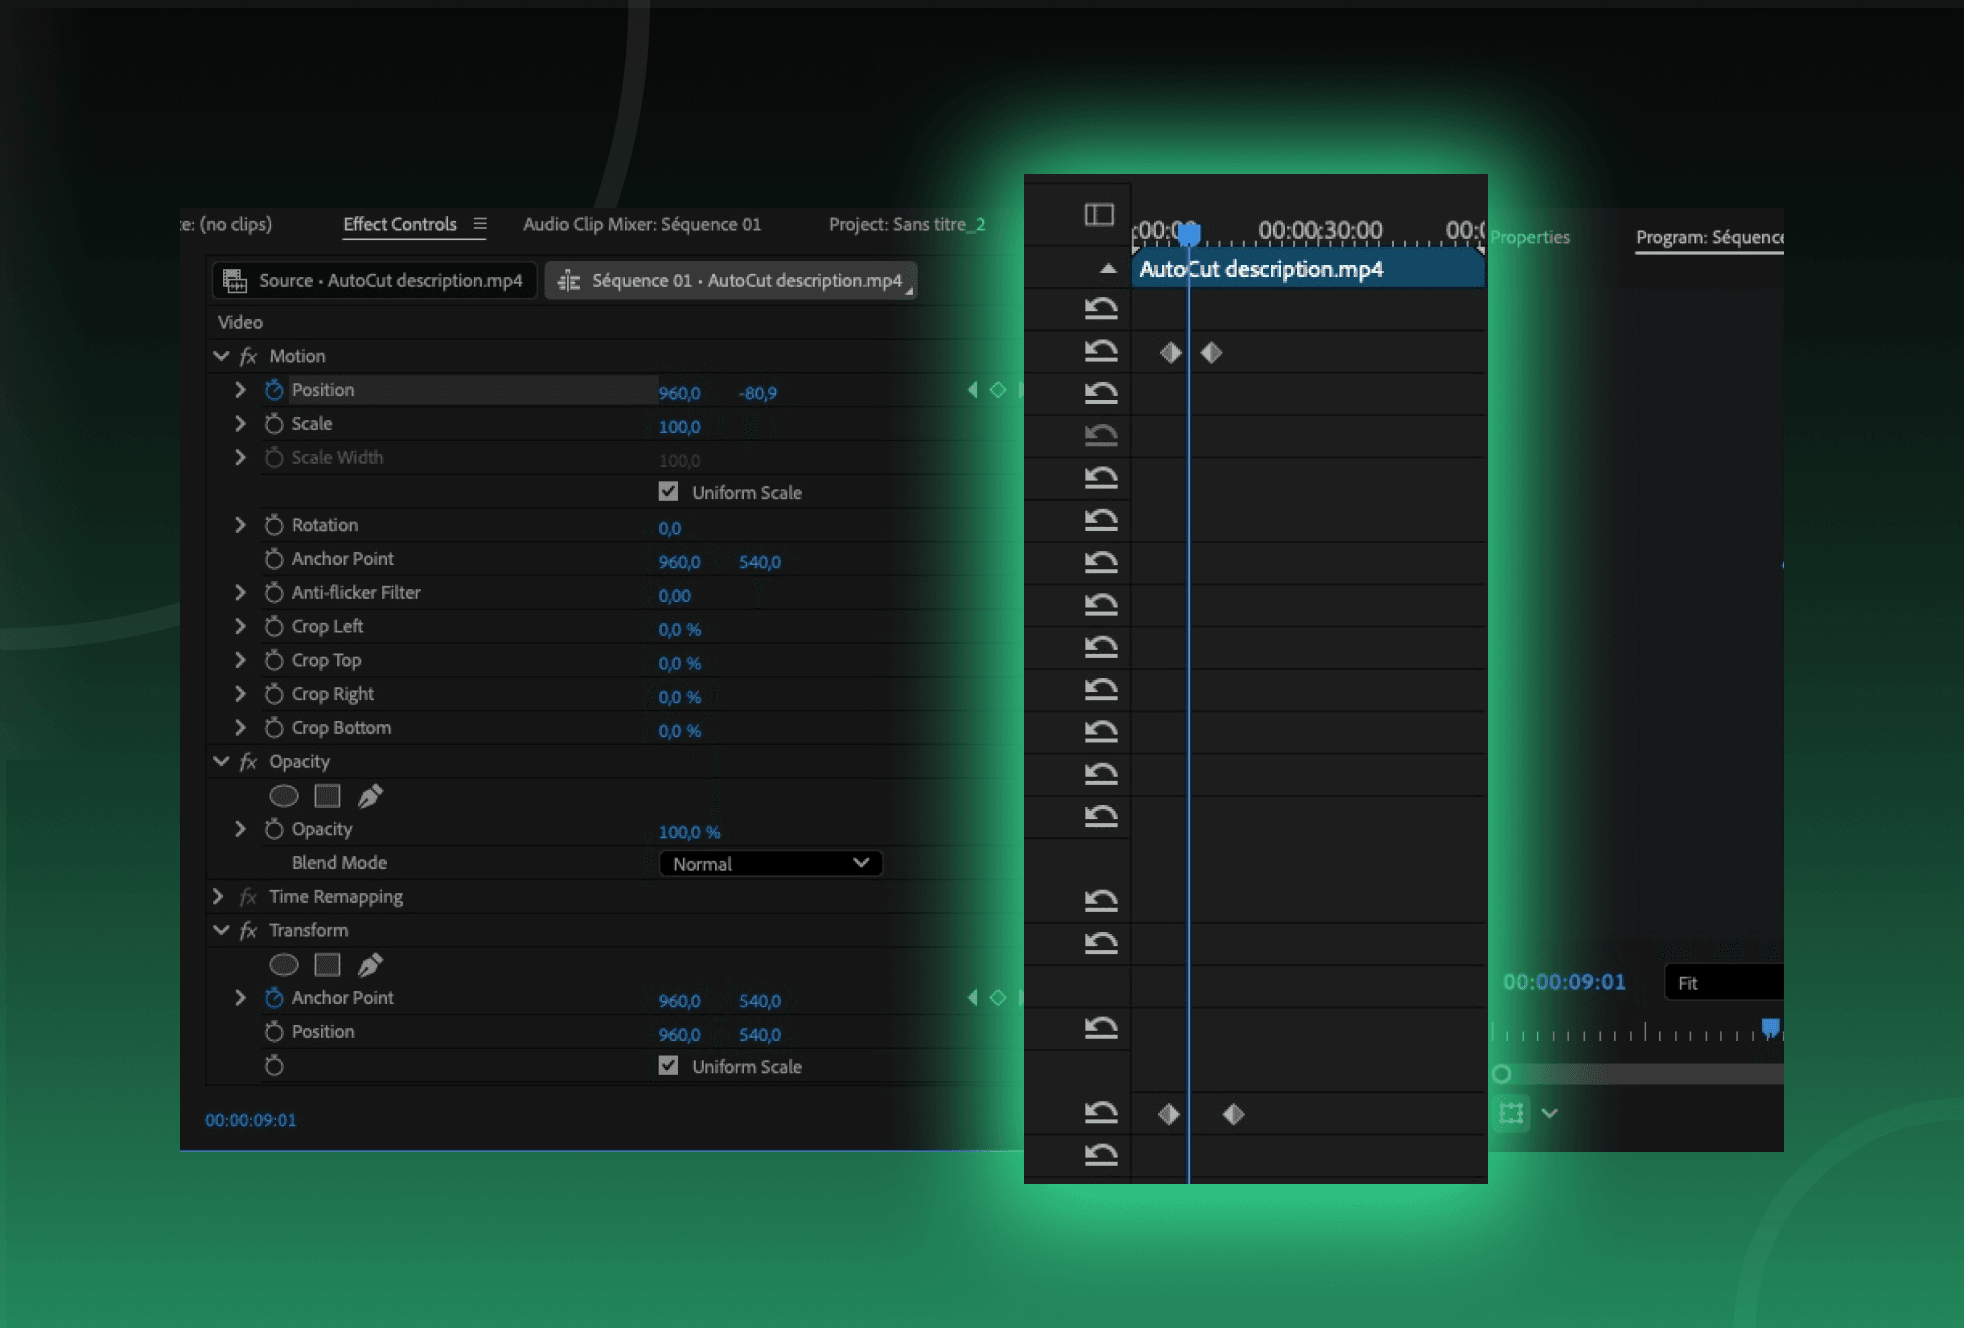
Open your Effect Controls panel in Premiere Pro. Under the 'Transform controls', add a few keyframes to the property you want to animate (for example, Position or Scale). Then, move your playhead between those keyframes.
Step 2 – Launch Smoothify through blinkl.io
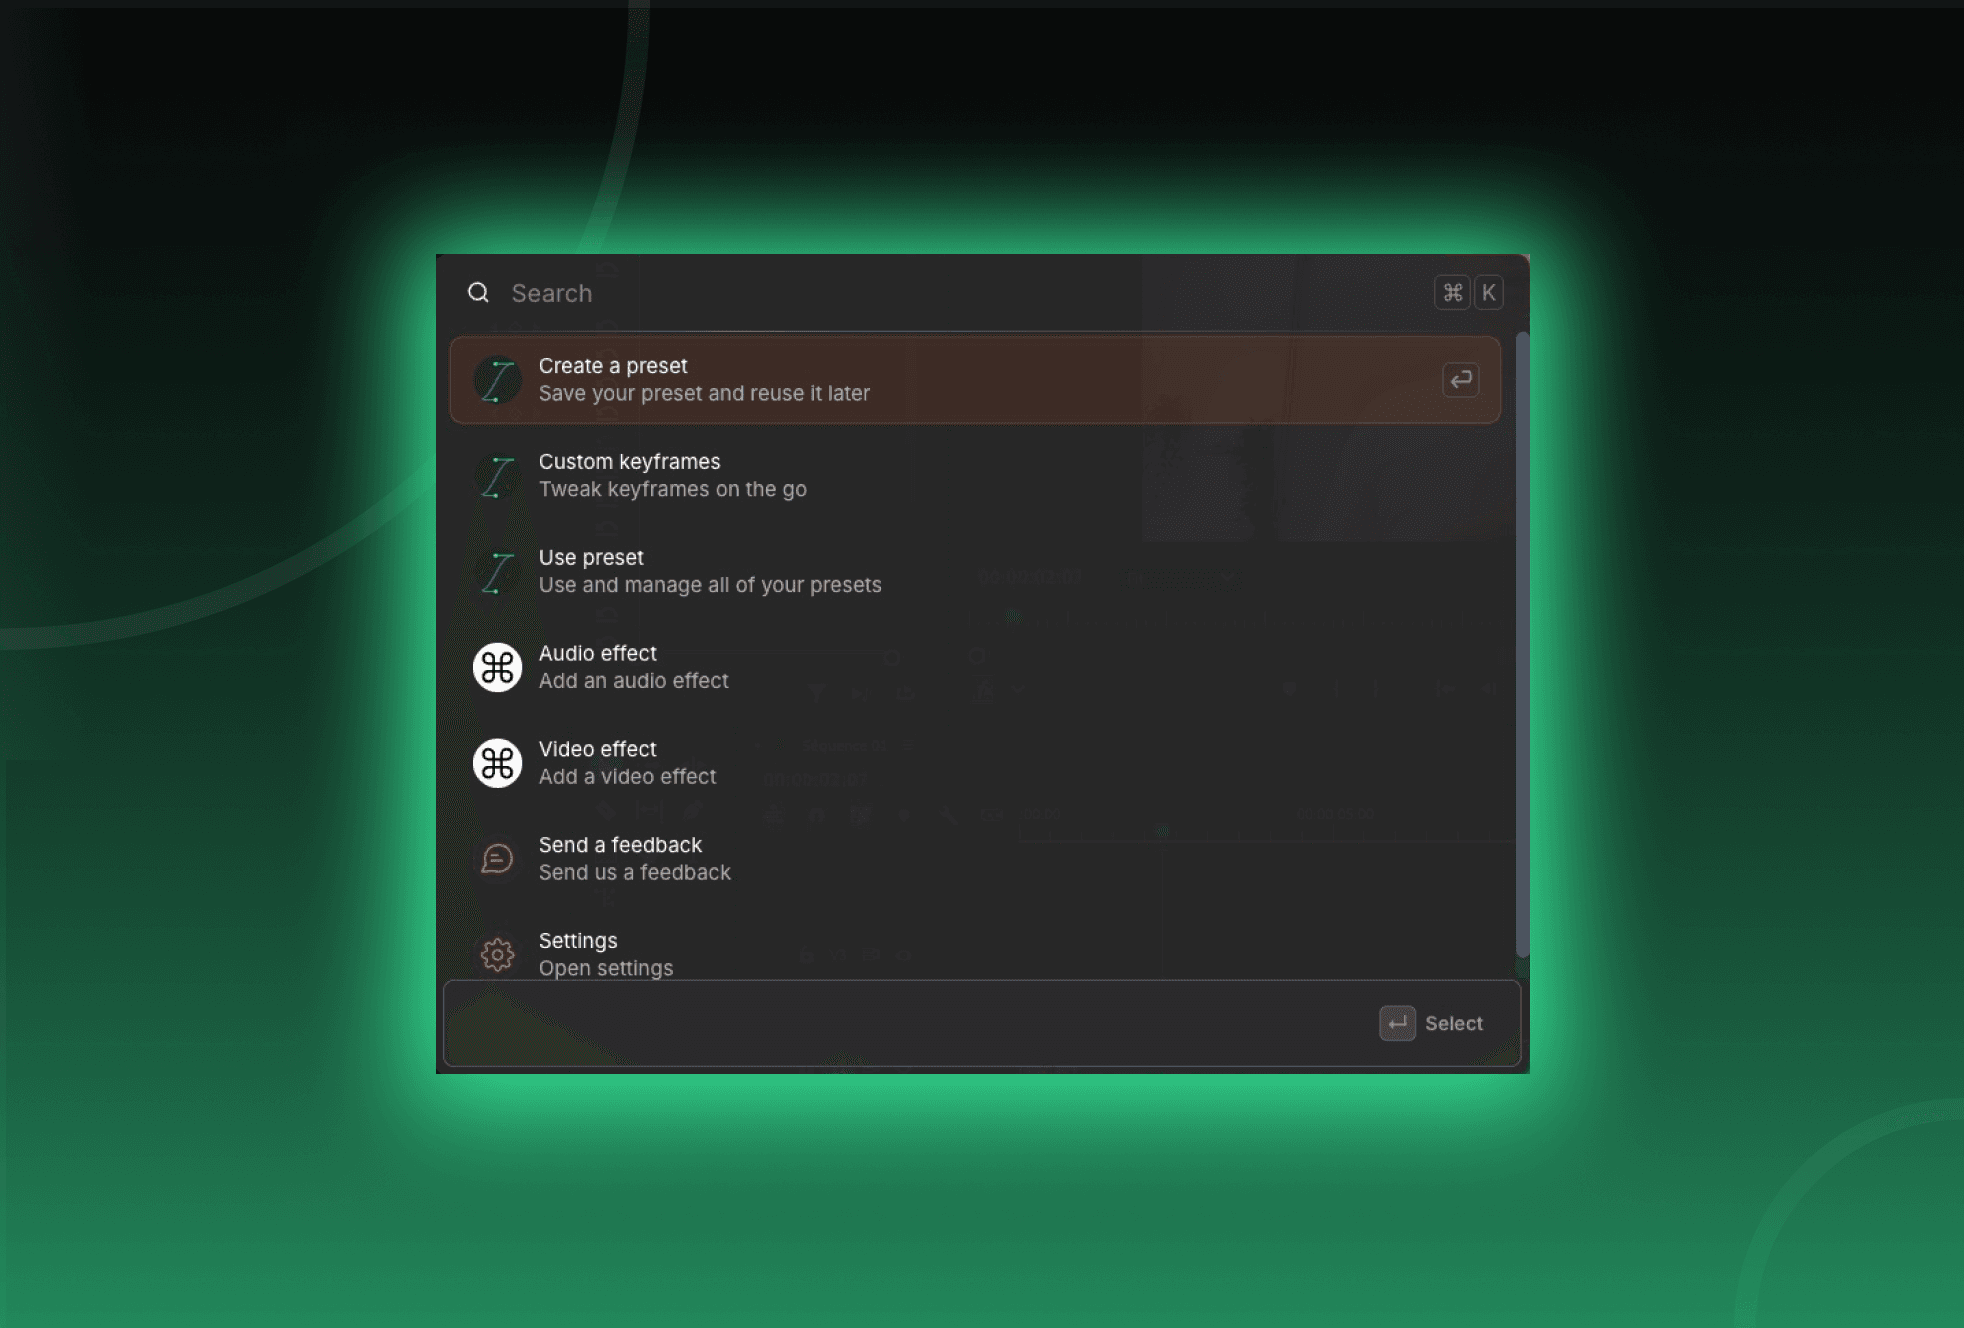
Use your shortcut to open blinkl.io. By default, it’s Command + K on Mac or Ctrl + K on Windows. Inside blinkl.io, type “Smoothify” in the command bar. Select Custom Keyframes, this tells Smoothify to work only on the keyframes you’ve selected in Premiere Pro.
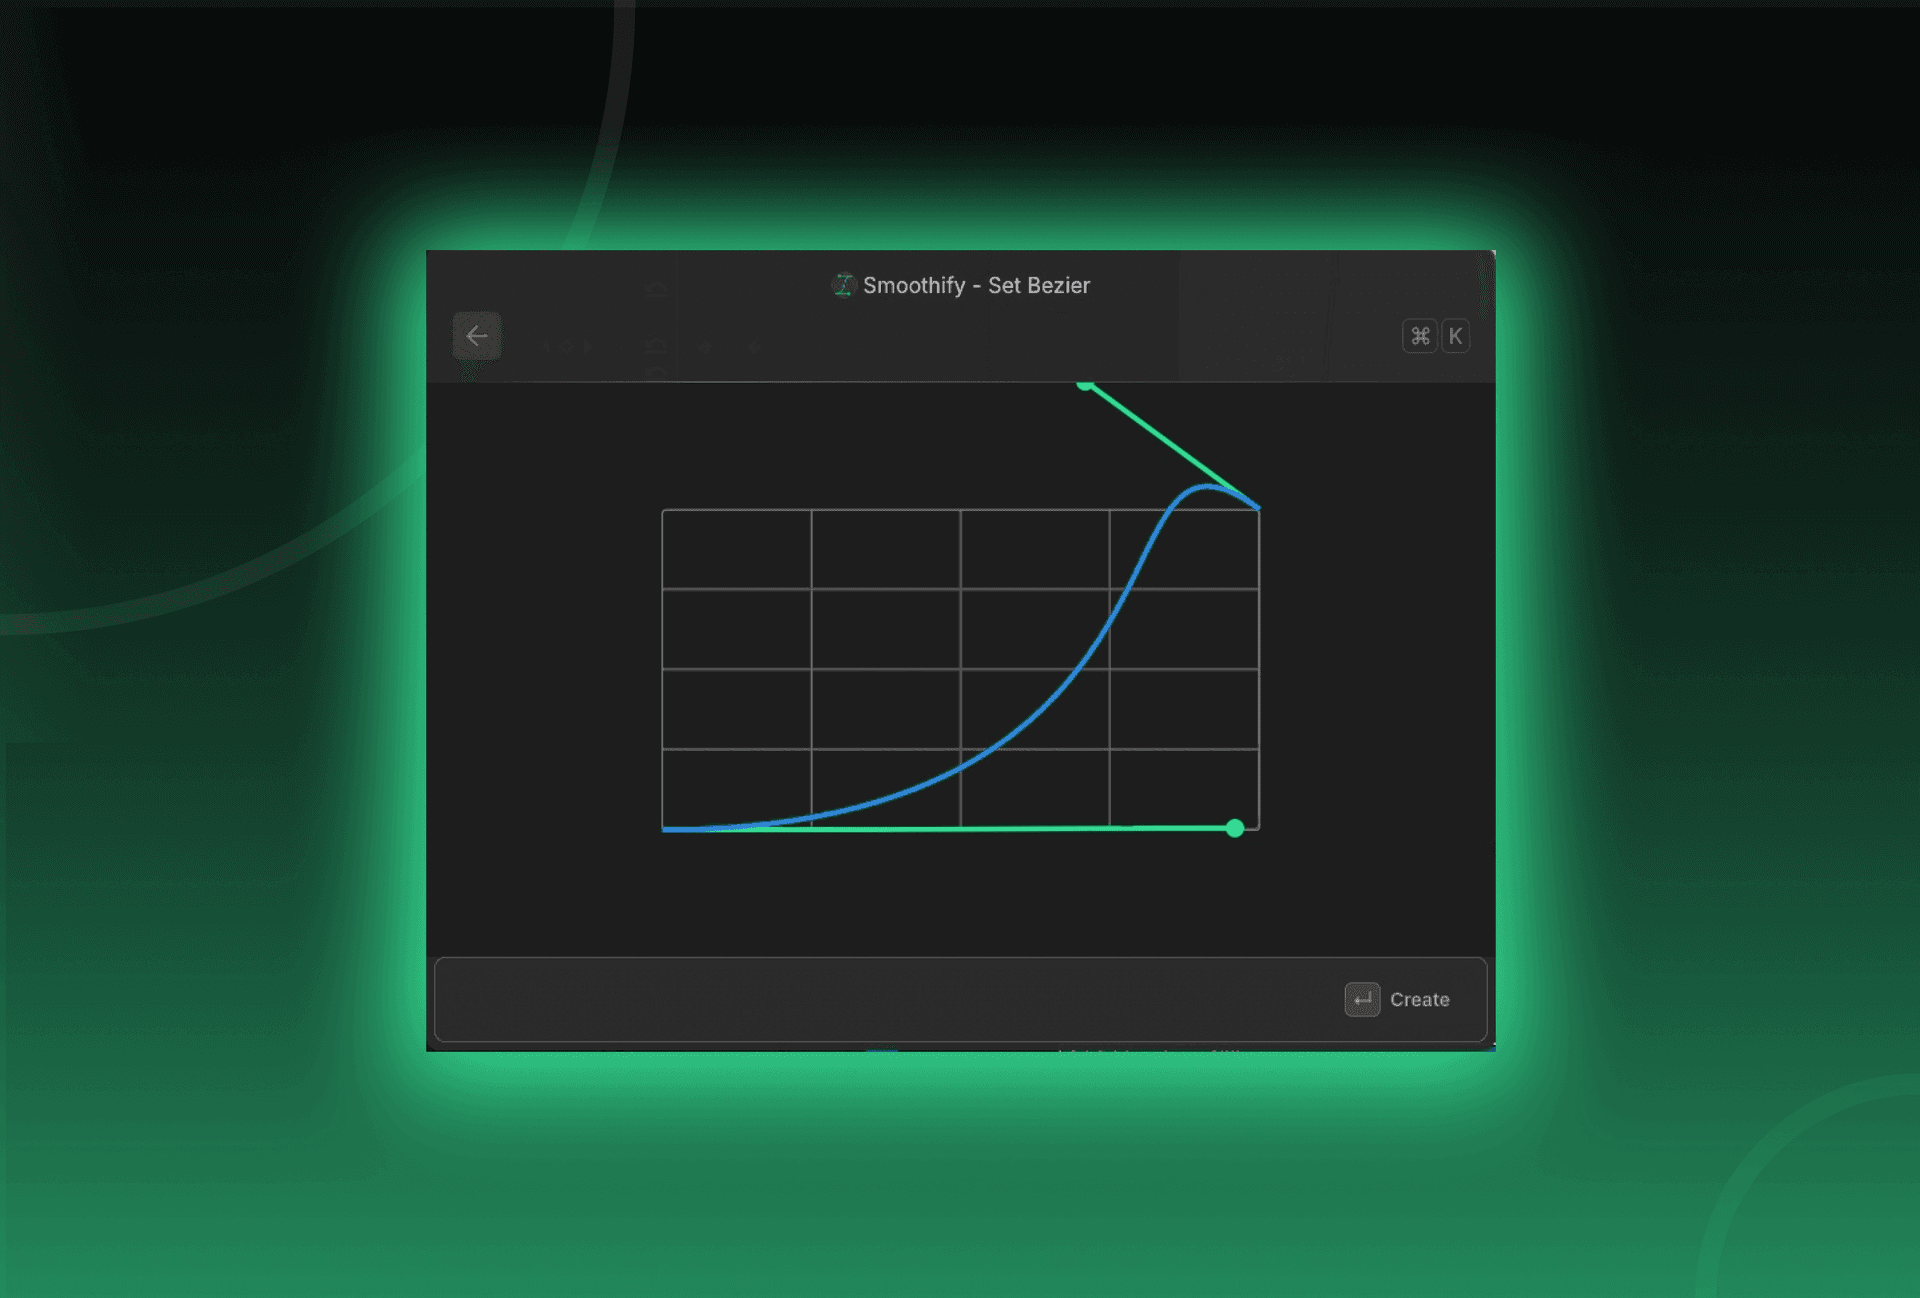
Step 5 – Adjust your motion curve
You can customize the curve directly:
- Use your mouse wheel to zoom in or out on the grid for precision.
- Adjust the Bezier handles to control the easing in and out.
When you’re happy with the result, click 'Apply' again to update it instantly.
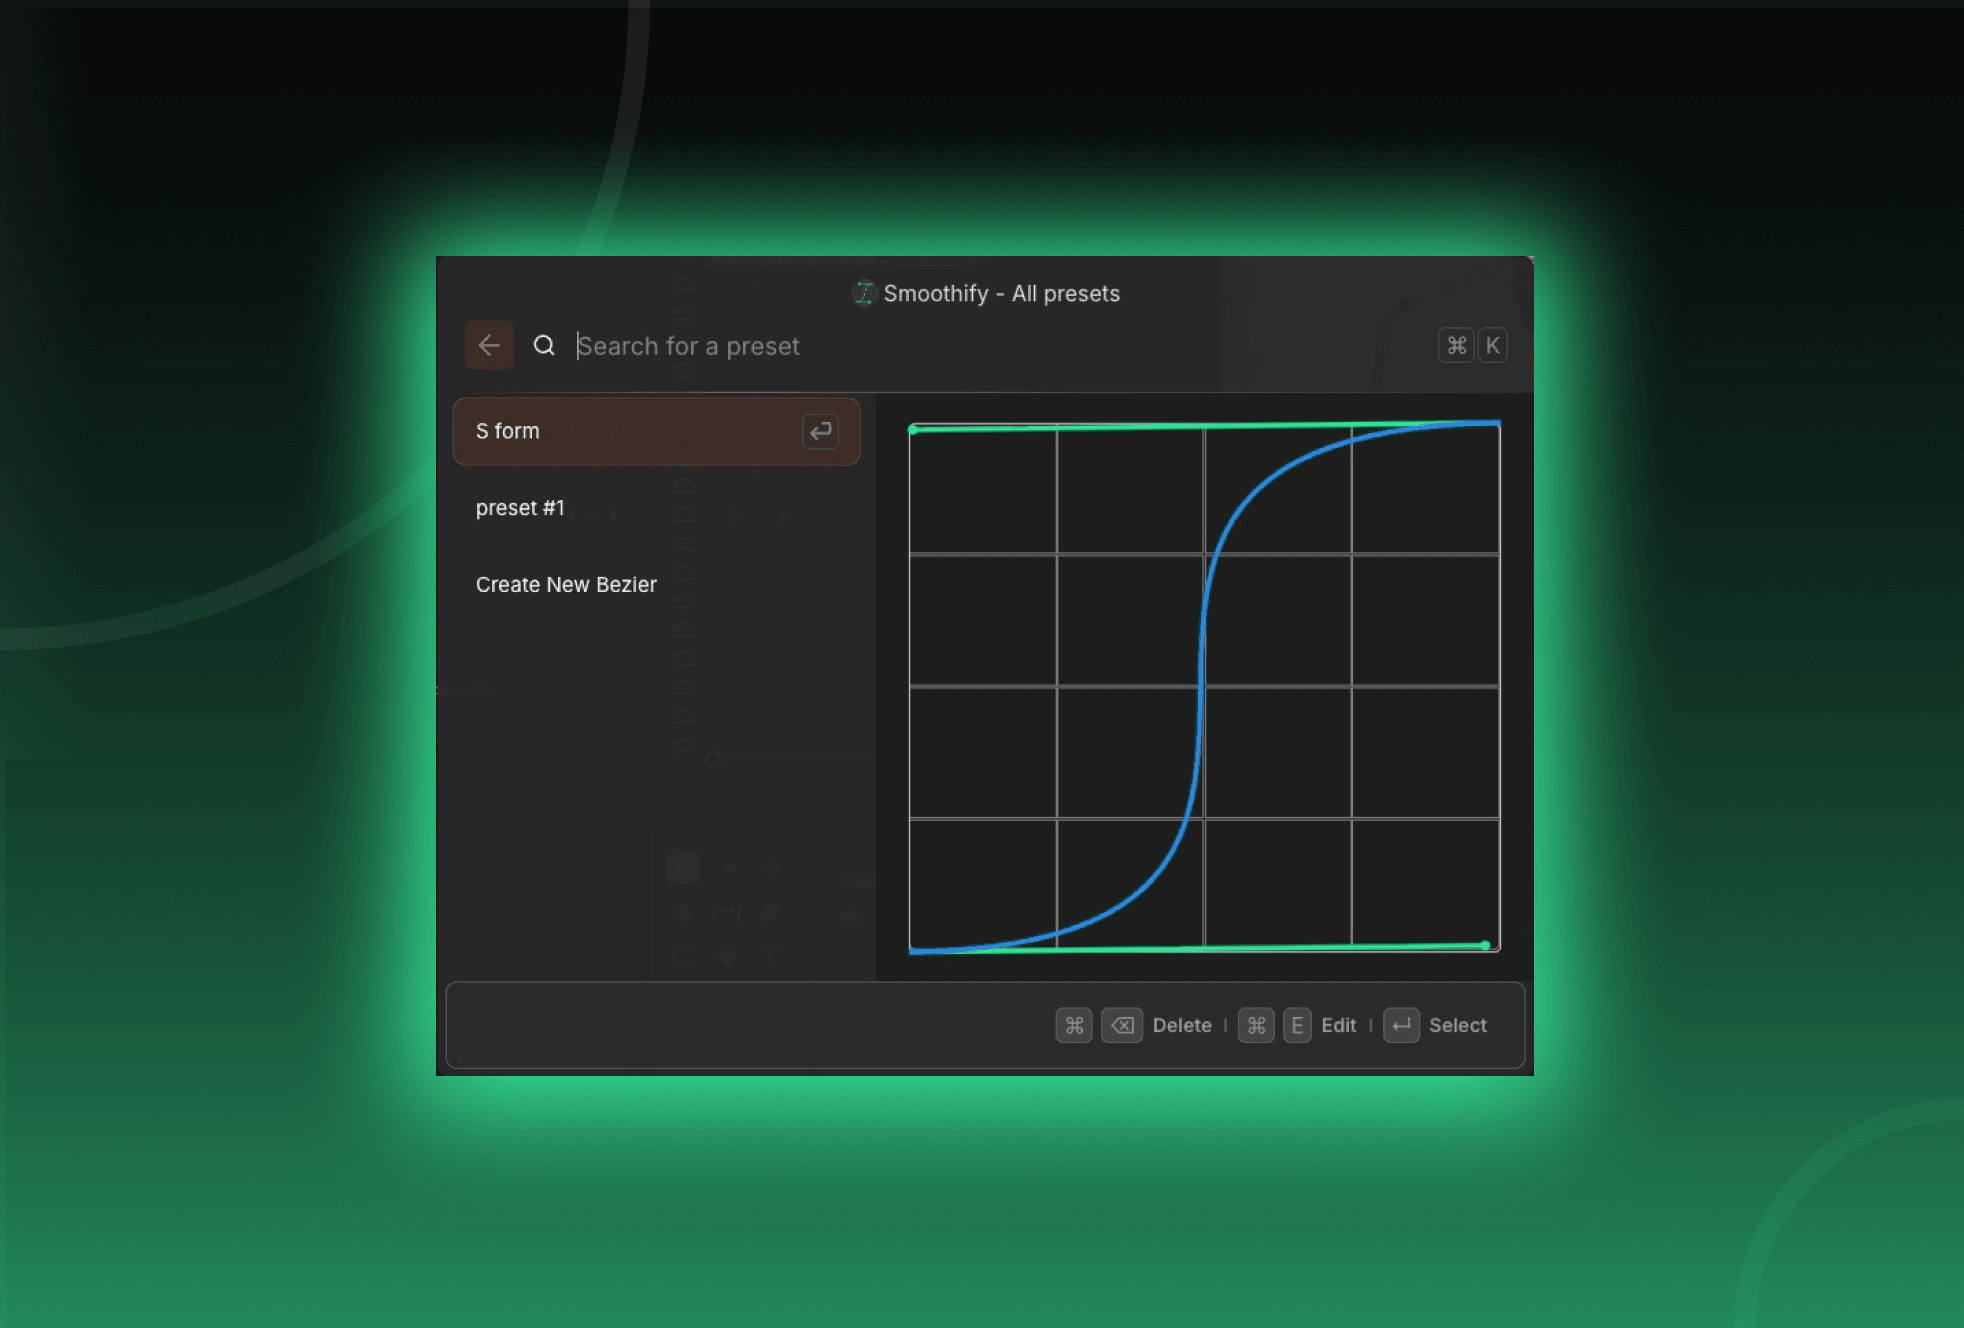
Step 6 – Save your preset
If you want to reuse the same curve later:
- Press Command + S (Mac) or Ctrl + S (Windows).
- Give your preset a name.
- It will appear under Use Preset next time you open Smoothify.
Your animation is now perfectly smooth. Smoothify helps you achieve professional, natural motion in seconds: all directly inside blinkl.io.