
 Download
Myriam HINDERER
2026-07-21
How to Recreate MrBeast's Zooms in Premiere Pro (Bouncy, Smooth, Ease Out)
MrBeast uses three zooms: bouncy, smooth, and ease out. Learn how to recreate all three in Premiere Pro in one click with the free Smoothify extension.
The quick answer
MrBeast's zooms are just scale keyframes with the right easing curve on them. You can build that curve by hand in the Premiere graph editor, or apply it in one click. Your options are:
- Set two scale keyframes and drag the Bezier handles in Effect Controls until the motion feels right.
- Reuse an easing preset you already trust on every clip that needs the same move.
- Or, with Smoothify, drop two keyframes, pick the curve from the Ring, and apply. Bouncy, smooth, or ease out, in one click.
All three MrBeast zooms come down to the same recipe: two scale keyframes, playhead between them, and the right curve. Here is each one.
The recipe behind every MrBeast zoom
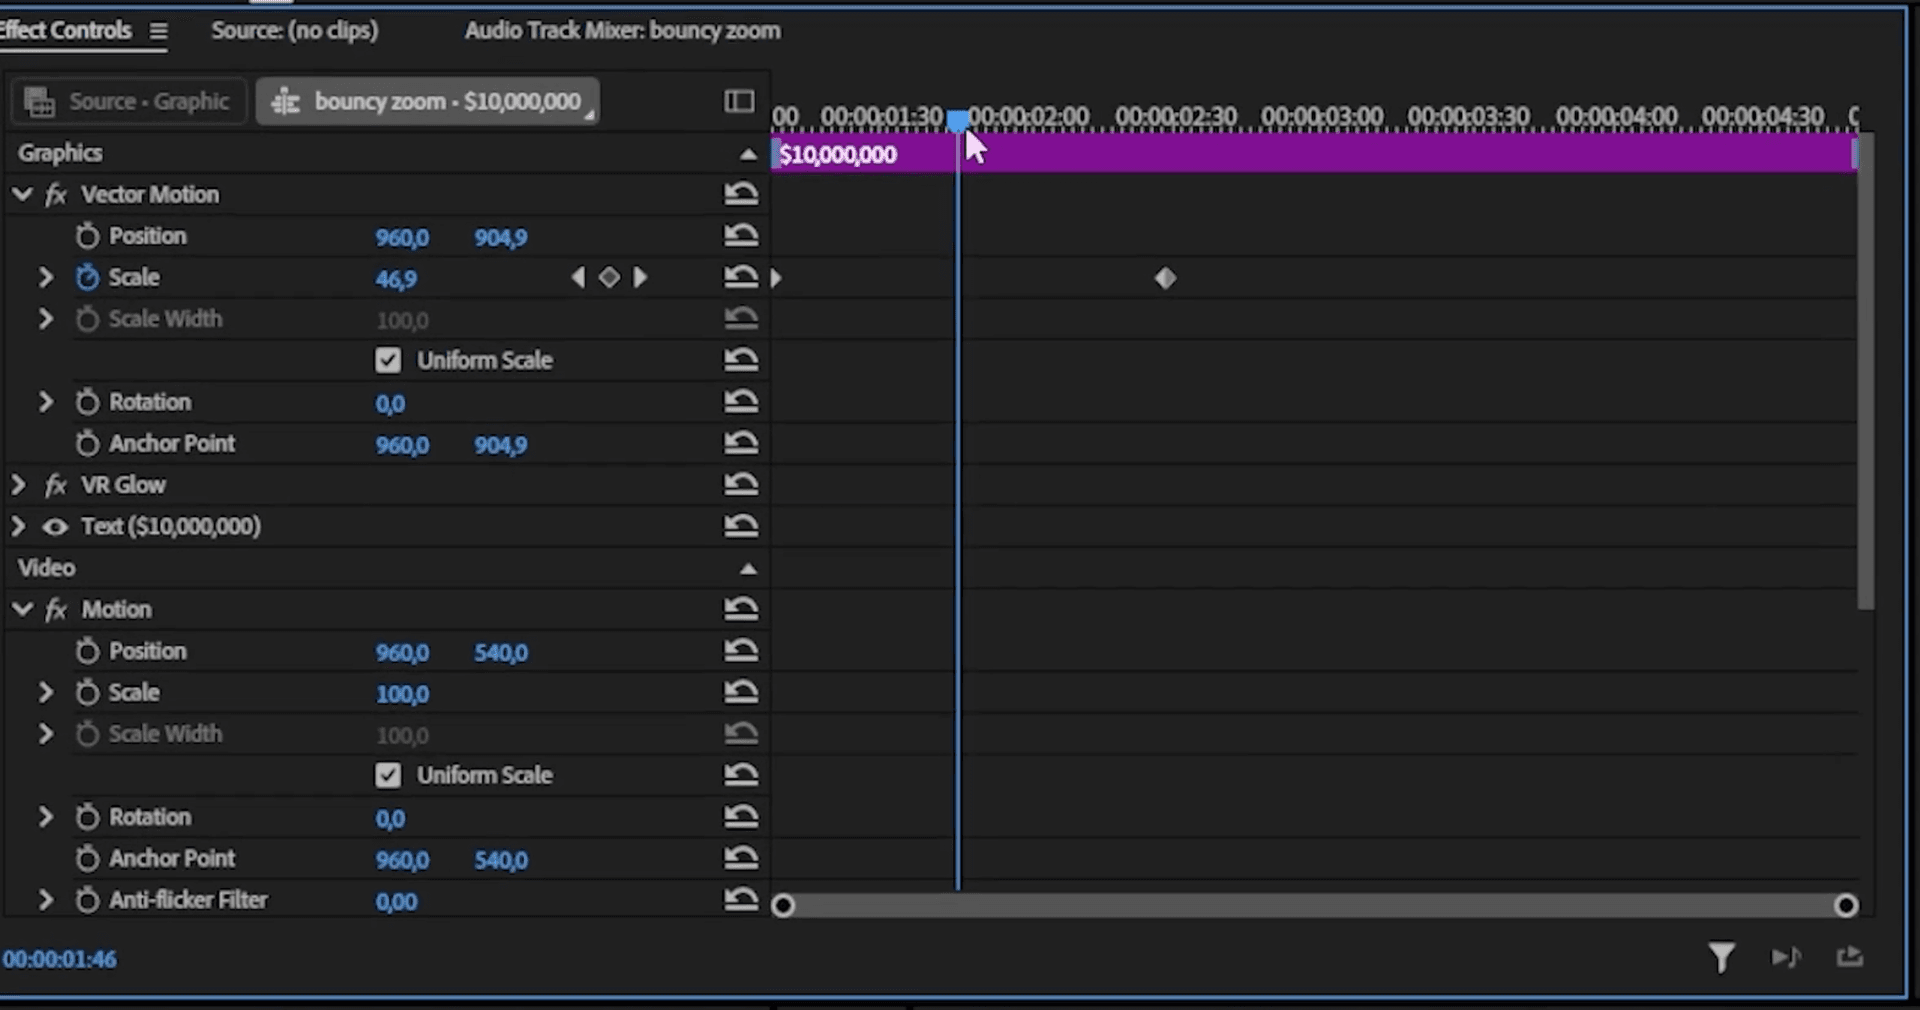
Every zoom below starts the same way. Select your clip, open Effect Controls, and add two Scale keyframes, one where the zoom starts and one where it ends. Then place the playhead between the two keyframes, open the Ring with Ctrl+Right-click, and go to Smoothify. That is where you choose the curve.
Zoom 1: the bouncy zoom (reactions and assets)
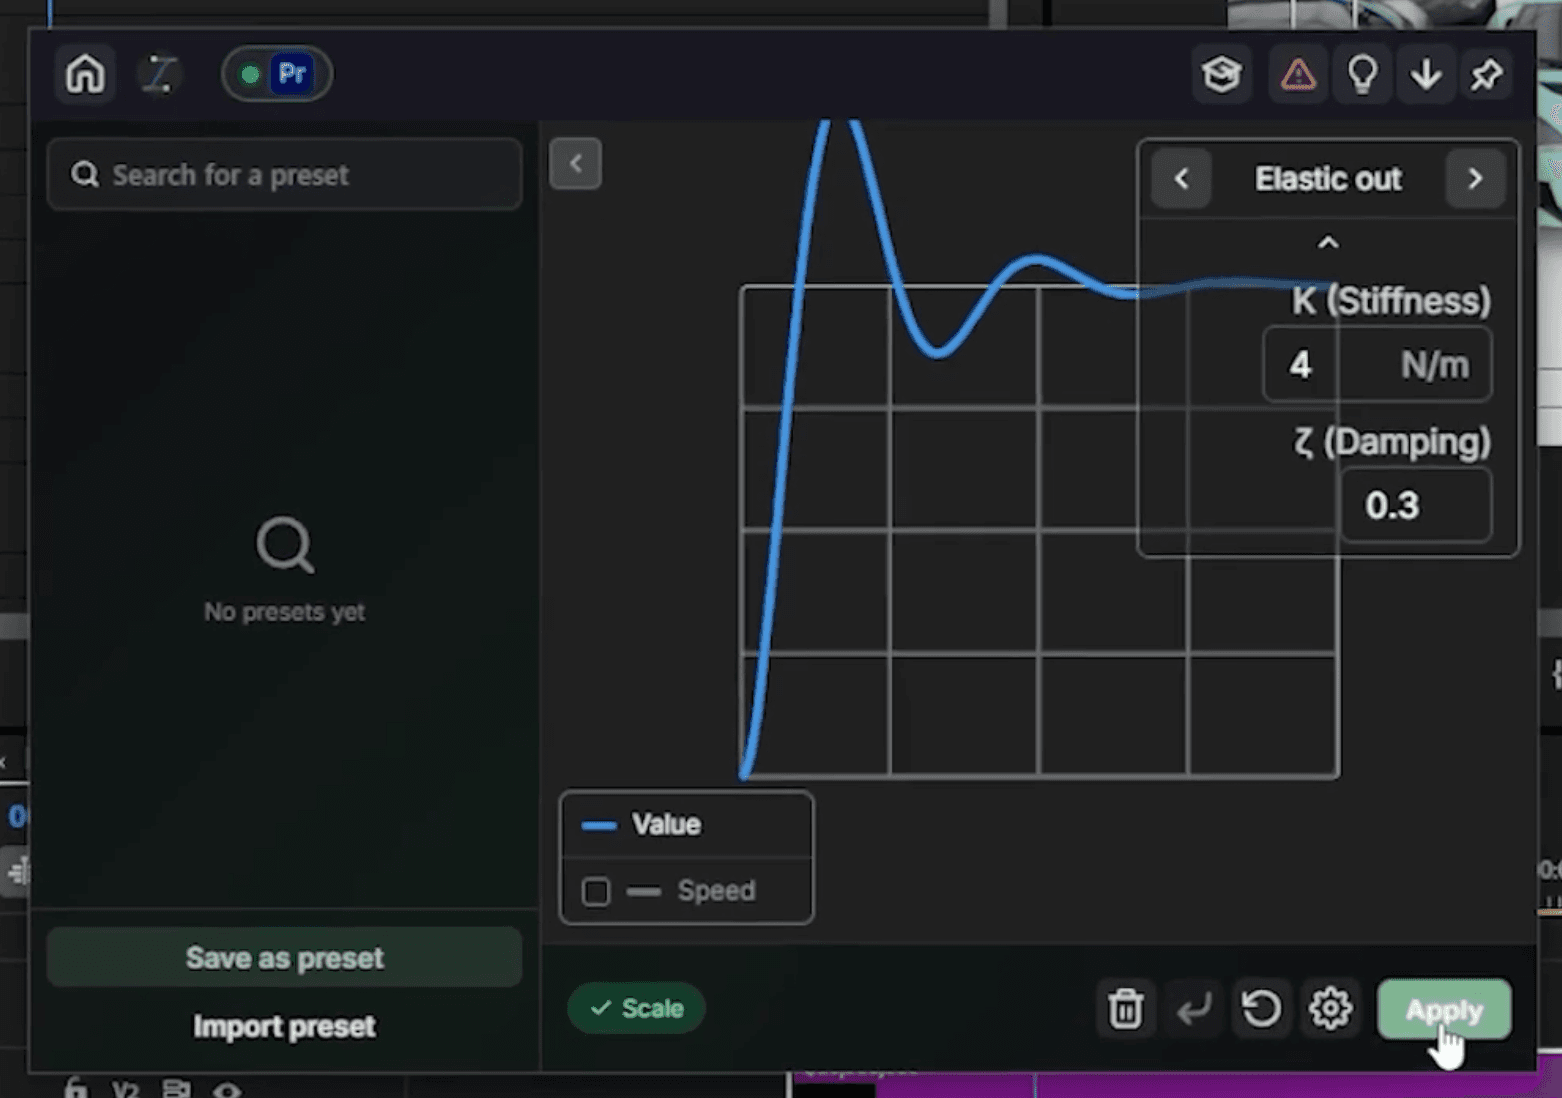
This is MrBeast's reaction zoom, the one that fires when a price pops on screen or an asset appears. It overshoots and bounces back, which is what makes it feel punchy.
- Select your clip and open Effect Controls.
- Add a Scale keyframe at the start and set it to 0.
- One to two seconds later, add another Scale keyframe and set it to 100.
- Place the playhead between the two keyframes and open Smoothify from the Ring.
- In the curve graph, select Elastic Out, set stiffness to 4 and damping to 0.3, then hit Apply.
That is the exact same bounce MrBeast uses on his reactions.
Zoom 2: the smooth zoom (add energy to a moment)
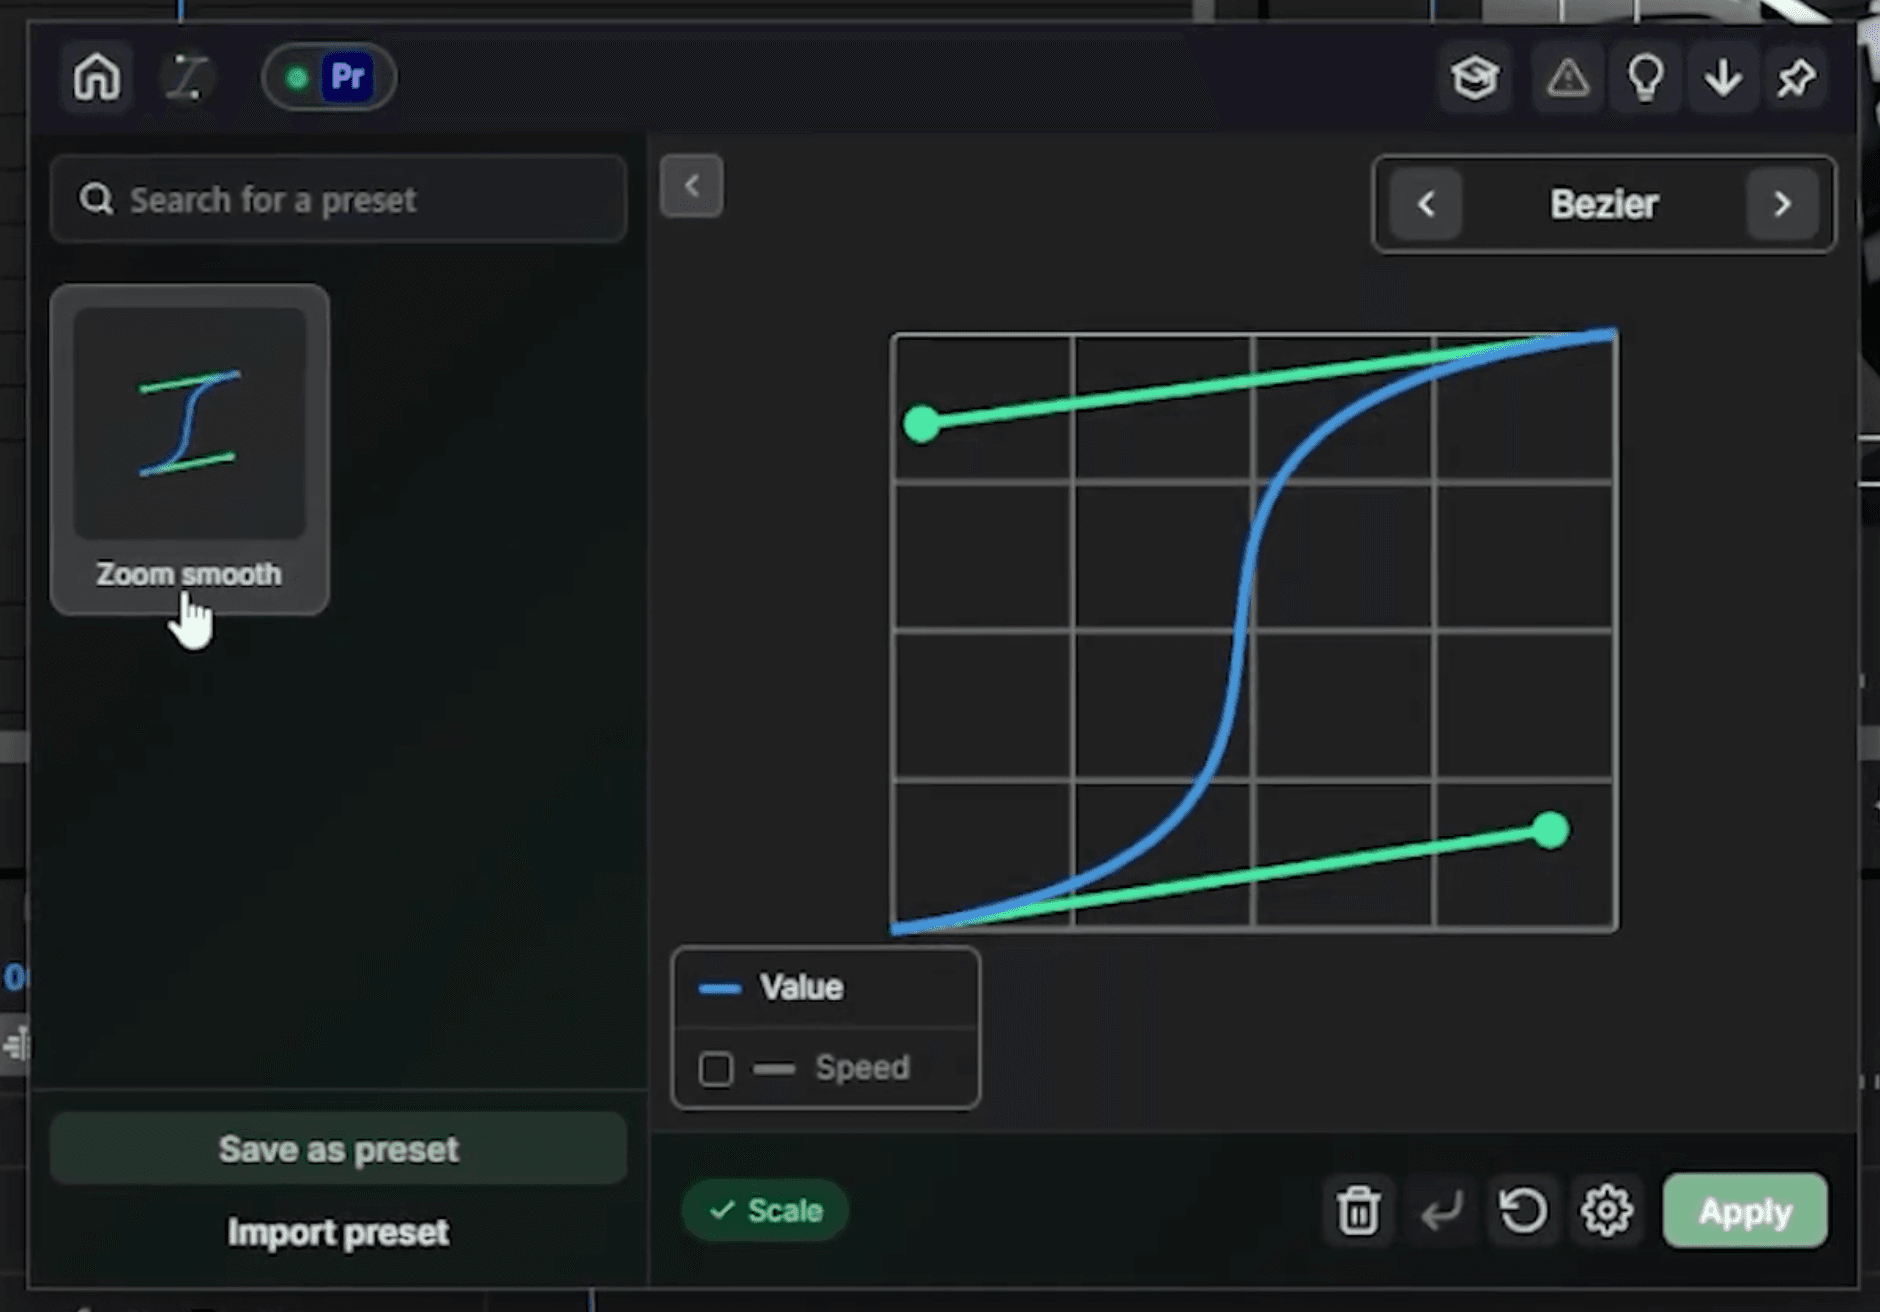
The simplest of the three, and one of the most useful. MrBeast uses it to push on a word or a small visual detail, adding energy without pulling focus.
- Add two Scale keyframes, the first at 100 and the second at 115.
- Place the playhead between them and open Smoothify from the Ring.
- In the graph editor, shape the smooth easing curve you want.
- Before you apply, click Save as preset and give it a name, so you can reuse it later. Then hit Apply.
One reusable preset, and every smooth push in your edit looks consistent.
Zoom 3: the ease out zoom (close-ups and reveals)
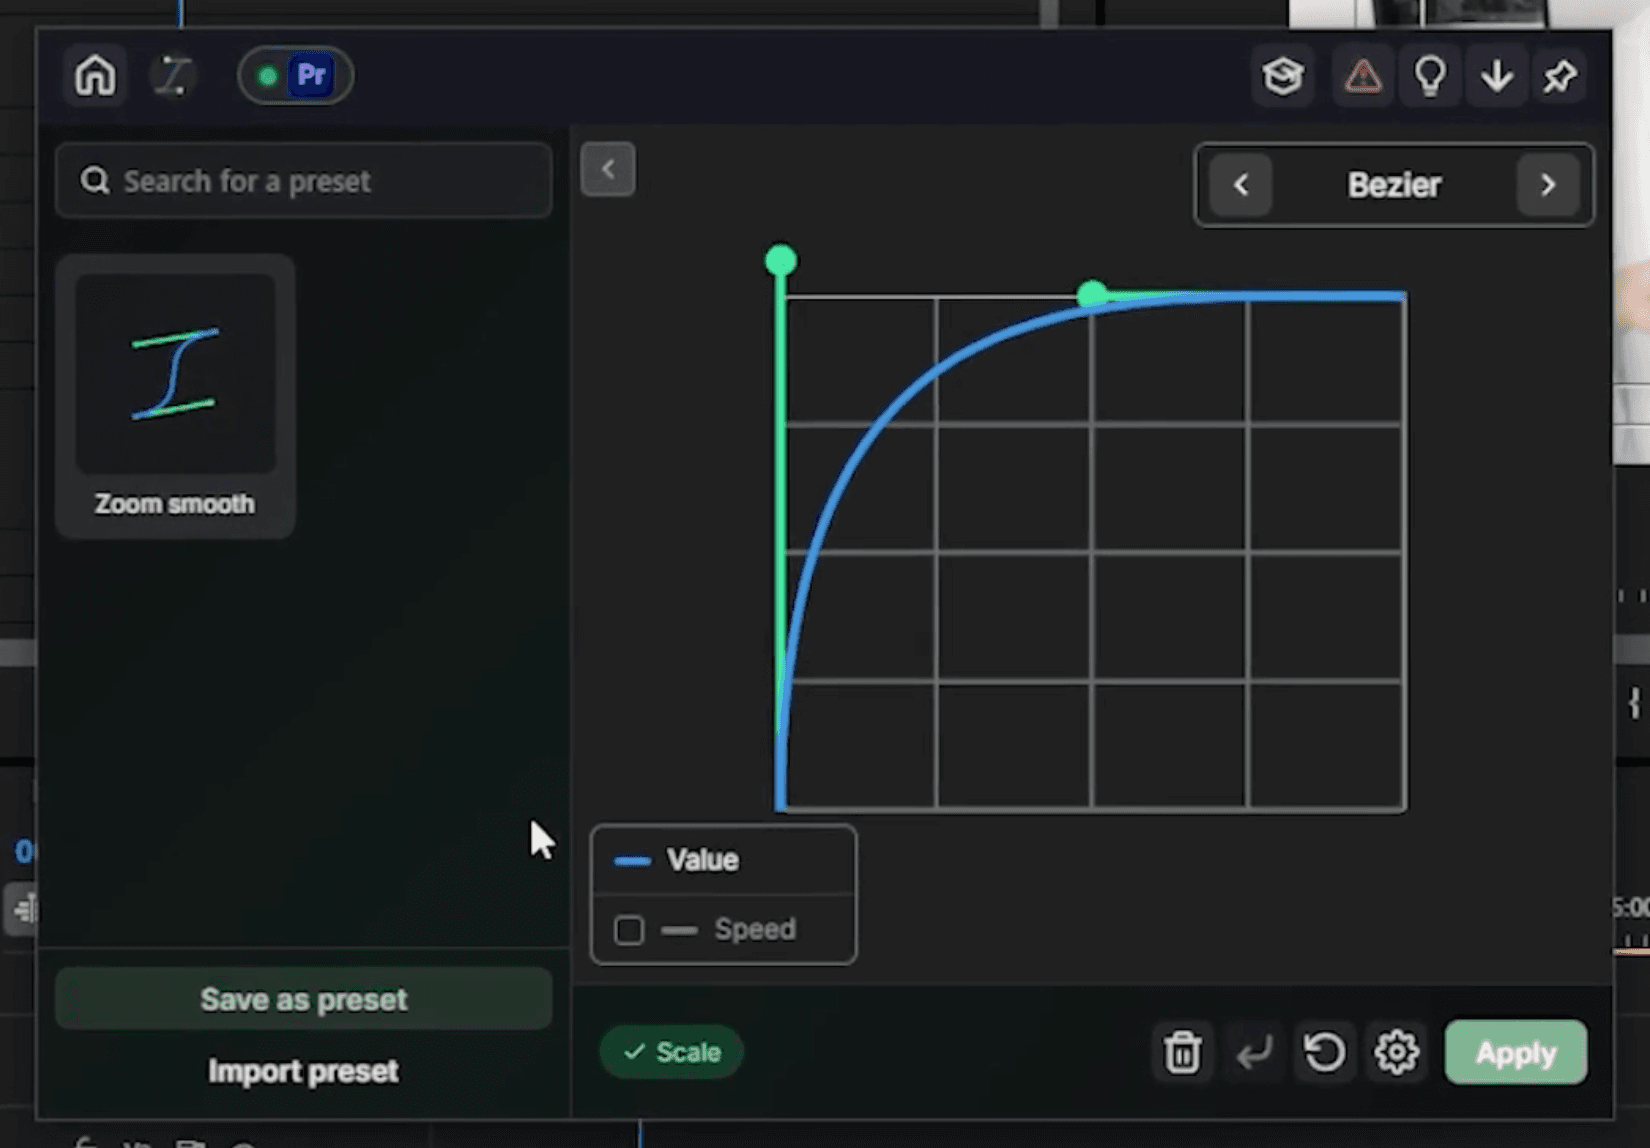
The most used zoom in MrBeast's videos. Fast at the start, slow to settle at the end. He punches in on a face or reveals a location with it.
- Add two Scale keyframes, the first at 100 and the second at 120.
- Place the playhead between them and open Smoothify from the Ring.
- In the graph editor, shape the ease out curve: quick acceleration, gentle deceleration.
- Save it as a preset if you want to reuse it, then hit Apply.
A proper ease out zoom, clean and repeatable.
Which MrBeast zoom should you use?
- Use the bouncy zoom for reactions and asset reveals, when you want the frame to snap and settle.
- Use the smooth zoom to add energy to a word or detail without breaking the viewer's focus.
- Use the ease out zoom for close-ups and location reveals, when you want a fast punch that eases to a stop.
Save them once, use them forever
MrBeast's dynamic feel is not one secret effect, it is consistency: the same three zooms, applied cleanly, over and over. Build them once in Smoothify, save them as presets, and every zoom you drop lands the same way. Two keyframes, one click, keep editing.
· MrBeast zooms in one click
Frequently asked questions
The short answers to the questions behind those punchy zooms.
What zooms does MrBeast use?
How do I make a bouncy MrBeast zoom in Premiere Pro?
Can I recreate these zooms without a plugin?
Can I save my zoom as a preset?
Is Smoothify free?
Which Premiere Pro versions does Smoothify support?
Myriam HINDERER
Chief Marketing Officer